Showing posts with label dessert. Show all posts

Tuesday, August 28, 2018

Raw Superfood Donut Holes (Vegan!)


My well loved, lil' ol' oven has been on the fritz lately, so I haven't been able to do much baking. I guess it's just as well because it's been too hot to enjoy baking anyway. Buuuut, I HAD to make something because I need my treats (y'all know). I decided to make a healthy, wholesome version of what may be the most fun baked good ever: donut holes!

The traditional donut hole is baked or fried, and laden with refined sugar and white flour. This version is refined sugar free, flourless, nutrient dense and still super satisfying in both texture and taste. I've been snacking on these for days and they are SO GOOD.

What more could you ask for? Oh yeah. The recipe...

Raw Superfood Donut Holes

Ingredients:

  • 1 cup raw almonds (can sub other nut of choice)
  • 10 dates, pitted & room temperature
  • 1/4 cup hemp seeds
  • 2 tbsp. chia seeds
  • 2 tbsp. sesame seeds
  • 2 tbsp. flax seeds
  • 2 tsp maca powder
  • 1 cup raw almond butter (I used Trader Joe's) or other nut butter of choice
  • 1/4 cup cacao powder
  • 3 tbsp. pure maple 
  • 3 tbsp. unsweetened vanilla almond milk (can sub non dairy milk of choice)

Combine the raw almonds and dates in a food processor. Pulse or blend on low until it starts to get crumbly. Add in the hemp seeds, chia, sesame, flax and maca powder. Pulse to combine. Add in the raw almond butter, cacao powder, maple and almond milk. Process on low until mixed, and then on high to make sure any large chunks are broken down and the mixture is mostly smooth. You may need to stop and scrape down the bowl a few times because the mixture is quite sticky. 
Transfer the "dough" into a large bowl. Line a cookie sheet with parchment paper and set aside. Use a tablespoon to scoop out the dough and roll them in your hands to make little balls. You can roll the balls in coconut, cacao powder and/or cacao glaze if desired. Refrigerate 30 min to an hour and then transfer them into an airtight container. Store in the fridge and enjoy!


**I REALLY recommend the cacao glaze. They're all good, but those are my favorite!

I didn't measure the ingredients for the cacao glaze, but it is pretty simple to make. Here's what I did:
In a small bowl, combine about 1 tbsp. cacao powder, 1 tbsp. pure maple and 2 tbsp. melted coconut oil. Stir or whisk to combine. Dip donut holes in the glaze, and place on parchment paper. Refrigerate until set.


xoxo Enjoy!


Thursday, April 5, 2018

Decadent Brownie Skillet with Eating Evolved Chocolate


There's nothing quite like a warm, gooey brownie straight from the oven. Nothing could be better, right? Well... how about if it was a warm, gooey brownie with NO ADDED SUGAR in the batter while still tasting like a sinful treat? Only in your dreams... until NOW. This brownie skillet is sweetened only with banana, the chocolate chunks are refined sugar free, it's also vegan and gluten free. This dessert is other level yum:

*Adapted from The Toasted Pine Nut

1 cup raw pecans (can sub almond flour)
1 ripe banana
1/2 tsp baking powder
1/2 tsp baking soda
3 tblsp cacao or cocoa powder
2 tblsp coconut oil, melted
1/2 Eating Evolved Crunchy Caramel Bar, chopped


Preheat the oven to 350 degrees. Prep a cast iron skillet with coconut oil or coconut oil spray and set aside. In a food processor, pulse the pecans until they resemble a crumble. Add in the baking powder, baking soda, cacao and coconut oil until combined. Add in the banana and process until smooth. Pour the batter into your prepared skillet and smooth with a spatula. Sprinkle your chopped Eating Evolved Crunchy Caramel Bar on top and press lightly into the batter. Bake for 12 minutes. Remove from the oven and drizzle with raw almond butter ( I love Trader Joe's Raw Creamy Unsalted Almond Butter) and a little sea salt if desired.

Don't forget to tag me on Instagram if you make this recipe!  I love seeing your versions :]#wildandflowertreats

Monday, October 30, 2017

Sweet and Salty Banana Chocolate Chunk Cookie Skillet (Vegan, Gluten Free, Refined Sugar Free)


Happy Monday! Super busy day today so far! I'm editing photos, answering emails and doing homework... but I had to stop to make this cookie skillet that has been at the front of my brain all week. Aaaaannd, after it baked up as a success, I had to immediately share it so that y'all can enjoy it too :] It's a little sweet, a little salty, soft, gooey, tastes totally sinful and not "Monday" at all. This cookie skillet is basically a glorified baked oatmeal, so honestly it can pass for breakfast! You can swap the chocolate chips for berries too, if you prefer. On top of that positivity bomb I just dropped on you, it is vegan, gluten free, refined sugar free, and can be whipped up in one bowl... by hand! I promise! This is totally a TREAT and not a TRICK (see what I did there?). I know, I know. I'm your hero ;]


Ingredients
  • 1 very ripe banana
  • 2 tsp vanilla
  • 1/3 cup raw almond butter (can probably sub roasted or any other nut butter)
  • 1/4 cup pure maple
  • 1 cup oat flour
  • 1/4 cup almond flour
  • 1 teaspoon baking soda
  • Pinch of pink salt (can sub sea salt)
  • A heap of dark chocolate chopped into chunks

Directions:

Preheat the oven to 350 degrees. Spray a cast iron skillet with coconut oil non stick spray and set aside. In a large bowl, mash the banana with a fork until it is a pureed consistency with little to no chunks. Whisk in almond butter, maple and vanilla. Add oat flour, almond flour, baking soda and salt. Whisk to combine. Transfer the batter to the prepped cast iron skillet and smooth evenly with a spatula. Top with dark chocolate chunks. Bake for 12 to 15 minutes or until it starts to take on a golden brown color, but keeps a soft center.

xoxo

Wednesday, June 14, 2017

Vegan Mixed Berry Chia Jam Tarts


I loved Pop Tarts growing up. I was especially fond of the strawberry Pop Tarts... and no, not the frosted ones. Shocked? Well, call me a purist. I can't remember when I last had a pop tart, but the fond memories of carefully eating all of the edges off, before savoring that gooey center are fresh in my mind. Having such a delicious memory on my mind is great and all, but I'd rather have it on my taste buds. Alas, I am much more aware of what I put into my body (damn adult concsious!) so I decided to make my own, wholesome version. Alright, now before you accuse me of some kind of crime against Pop Tarts, I caved and topped them with pink frosting and sprinkles. We good? Cool.

Adapted from Minimalist Baker

  • 2 cups whole wheat flour 
  • 2/3 cup coconut oil (you can also use vegan butter or regular butter if not vegan)
  • 2-4 Tbsp ice cold water
  • 1 heaping cup frozen mixed berries
  • 2 tbsp chia seed
  • 1 Tbsp coconut sugar
Glaze

So, I just sort of whipped up a glaze without any real measurements. Here's what I did:

  • About 1 cup powdered sugar
  • A splash of unsweetened vanilla almond milk
  • 1-2 tsp Karo Syrup
  • A bit of red food coloring paste


Mix the powdered sugar and the milk together into a smooth paste. Add the Karo syrup and food coloring paste until you get the desired hue. The glaze should be liquid enough to easily drizzle over the top, but thick enough to stay in place and harden when cooled. 

  1. Preheat oven to 375 degrees F and line a baking sheet with parchment paper.
  2. Prepare the mixed berry chia jam filling by placing berries in a small saucepan over low heat with 2 tbsp water. Cook for 5-8 minutes and smash with a fork once the berries are soft. Remove from heat and add chia seed and coconut sugar. Transfer to a bowl to cool.
  3. To prepare crust, mix flour and salt in a large bowl, then process with coconut oil in a food processor.
  4. Using a tablespoon, drizzle cold water over the mixture and pulse until it starts to form a dough. The dough should be moist enough to form into a ball, but not too sticky to roll out. Add more water if needed or more flour if it gets too wet and sticky.
  5. Turn onto a floured surface, shape into a disc, and then use a rolling pin to roll into a large rectangle.I used a sheet of parchment on top to keep my rolling pin from sticking to the dough as I rolled it out.
  6. Cut into equal squares or rectangles and carefully transfer each to the baking sheet. Use your fingers to press the centers down a bit to make a little "bed" for the chia jam. This will help to keep it from seeping out the sides while baking.
  7. Place about 1 Tbsp of filling onto half of the squares, leaving a border to seal the edges. Then use your finger to dot water around the edges to help the squares stick together. Top the squares with their matching halves and then seal lightly with a fork.
  8. Use a fork to poke holes in the top of each sealed tart, and bake for 20-25 minutes, or until golden brown.
  9. Let cool completely, then top with glaze if desired. 
Happy tarting!

xoxo

Thursday, March 9, 2017

Almond Butter Cup Protein Cookies


Today I made a really tough decision. Life changing. I decided that it was time to take a break from peanut butter and give almond butter a chance to show me what's up. Ok, so maybe it's not so serious. Or maybe you just don't realize how much PB I actually consume on a daily basis. I currently have a nearly empty crunchy bae sitting in the fridge with 2 brand spankin' new jars up in the cupboard. No grocery run is complete without a trip down the Isle of Creamy Dreamy. To my shock and dismay, I recently read somewhere that a fellow PB loving baker actually developed an adult stage PB allergy from consuming waaay too much (I will still argue that too much PB is not a thing)! Reading that scared the crunchy-creamy dickens out of me, so I picked up some alternates. Sooo... to help me get through this rough patch, I decided to let almond buttah do me a solid and whip up the kind of cookies you make when you're heartbroken: the sweet, salty, sinful-but not so sinful that you feel guilty- kind of cookies. These are flourless, gluten free and refined sugar free with a pea protein pow! Crunchy, chewy, sweet and salty satisfaction. There is light at the end of the tunnel... or maybe that's the fridge light. Whatevs.

Almond Butter Cup Protein Cookies

1 cup almond butter
2/3 cup coconut sugar
2 scoops unsweetened pea protein (can sub other unflavored or vanilla protein powder if desired)
1 egg

Chocolate Glaze

2 to 3 tblsp dark choco chips
1 to 2 tsp coconut oil

Almond Butter Glaze

1 heaping spoon almond butter
1 to 2 tsp coconut oil

Preheat the oven to 350 degrees anf line a baking sheet with parchment paper. Whisk the almond butter and coconut sugar with an electric mixer. Add in the egg and whisk until combined. Whisk in the protein powder. A crumbly but moist dough should form. Roll about 1 inch balls of dough in your hand and place on your prepared cookie sheet. (I was able to get 24 cookies this way. You can definitely roll bigger balls of dough if you want larger cookies)
Bake for 8 to 10 minutes or until slightly golden but still soft. Remove from the oven and transfer to a cooling rack. While your cookies cool, prepare the chocolate coating and almond butter drizzle. Melt each in separate bowls with coconut oil. 30 second increments until smooth. Dip each cpokie halfway into the chocolate and place on a tray lined with parchment. Pop in the fridge or freezer to set. Remove from cooling and drizzle with melted almond butter. Place back in the fridge or freezer until set and enjoy!

I like to keep these in the freezer. Keeps them nice and chewy.

Friday, March 3, 2017

Gooey Gluten Free Brownies


Chocolate and I have carried on a long time love affair. Chocolate and I understand each other. Chocolate and I have a bond that cannot be broken. That's why you may notice that nearly all of the recipes I post have chocolate in them. When I think sweet, I think chocolate. Brownies are the ultimate chocolate dessert. I have tried a lot of brownie recipes in my day, but this one might just top all other brownies. First of all, they are made with my favorite flour to bake with: oat flour (xoxo). Secondly, you can change up the sugar and use either cane sugar or coconut sugar (my other fave baking buddy). Both result in ridiculously delicious brownies, but for different reasons. I'm not really a fan of cane sugar, and I reaaallllyyy try to keep that refined babe out of my sweets... but using white sugar creates a crazy beautiful and satisfying crust like nobody's business. The brownies will puff up when baking and then sink when you take them out of the oven, creating cracks of crusty goodness hugging a shy, gooey center. That was my first experience with these brownies, following the original recipe (sans coffee), which you can find here. My second time baking these brownies, I swapped out the refined sugar for coconut sugar. This resulted in a more dense, fudge-like brownie with crazy-complex flavors. The coconut sugar and butter create a sort of (ah-mazing) caramel base, and when they are baked and cooled (I always put my brownies in the fridge or freezer), they taste faintly of coffee. Don't even get me started on the crazy-good and chewy texture with studs of dark chocolate. I cut these babies into bites and store them in a ziplock in the freezer. I eat them cold, but popping a few in the micro for 10-15 seconds is something I can't (and won't) argue with.

Ingredients

1 1/3 cups oat flour
3/4 tsp baking soda
3/4 (1 1/2 sticks) cup unsalted butter
1 1/2 cups coconut (or cane) sugar
1 cup cocoa powder
1 tsp salt
1 Tbsp vanilla extract
3 large eggs
1 1/4 cup dark chocolate chips or chunks

Preheat the oven to 350 degrees and line an 8x8 ceramic baking dish with parchment paper. In a separate bowl, mix together the oat flour, baking soda, and salt. Set aside. In a microwave safe bowl, melt the butter. Mix in the sugar and then microwave for another minute. Whisk by hand with a wire whisk or fork until smooth and creamy. Add in the vanilla and cocoa powder. Mix in the eggs one at a time until smooth. Fold the dry ingredients into the wet until just combined. Don't over mix! Top with dark chocolate chips or chunks and bake for about 20 minutes. Remove from the oven and let cool at least 10 minutes before cutting.

*NOTES:

I baked these in a ceramic baking dish and they turned out beautifully. I also tried a batch in a metal pan, but they turned out dry and cakey.

These are best a bit under-baked. They will look too gooey when you remove them from the oven, but they will firm up as they cool.


Wednesday, February 8, 2017

Vegan Double Chocolate Cake


I'm not a huge fan of Valentine's Day or the expectations that come with it. Sure, hearts are cute, and who doesn't love a box of chocolates? I'm just not a fan of how the holiday creates a buying frenzy. Love should be celebrated everyday, and I fully believe in showing the people you love how you feel in little, meaningful ways - every single chance you get - ...but I don't think that should mean buying a bunch of 'stuff'. I also hate the question, "So, what did he/she/they get you for Valentine's Day?", like it's some sort of competition. Now, I don't mean to sound like a jerk, but I just think that this holiday is LAME. This is coming from a hopeless romantic (I know it may not sound like it with all of my anti-Valentine's ranting). I have never thought that this holiday was romantic, and that's just my opinion. I'll take those, stay up late talking about life, kiss me in the middle of an argument, hold my hand while watching TV, bring me a flower you picked on your way home when you thought of me, and pinch my butt in the middle of the grocery store because you think I'm really cute (P.S. not an invitation to strangers) kind of moments. It's the little everyday things that matter to me.


Anyway, you know what's not lame? CAKE. Here's a yummy recipe:

Vegan Double Chocolate Cake
Slightly Adapted from Minimalist Baker

1 1/2 cups unsweetened vanilla almond milk
2 tsp apple cider vinegar
1 1/4 cups unsweetened applesauce
1/2 cup hot coffee (I used instant)
2/3 cup melted coconut oil
2 tsp pure vanilla extract
2 cups + 2 Tbsp whole wheat white flour
1 1/3 cups coconut sugar
1 cup cocoa powder
2 tsp baking soda
1 tsp baking powder
1/4 tsp sea salt

FROSTING
1 cup vegan butter, softened
2 1/2 powdered sugar
2/3 cup cocoa powder
1/4 cup dairy-free dark chocolate, melted and cooled
Splash of almond milk if needed

Preheat oven to 350 degrees. Spray 2 8-inch round cake pans with nonstick spray and dust with cocoa powder. Tap the pans over the sink to shake out the excess, and set aside.
Mix the almond milk and vinegar in a large mixing bowl, and let set for a few minutes to thicken. Add the oil, coffee, and applesauce and beat until foamy.
Add the flour, sugar, cocoa powder, baking soda, baking powder, and salt to a separate bowl and whisk together. With your mixer on low, slowly add the dry ingredients into the wet ingredients. Mix until smooth and creamy (batter should be thick, but pour-able). Divide batter evenly between your 2 cake pans. Bake 25-30 minutes, or until a toothpick inserted into the center comes out clean. Let cool completely before frosting.

While the cakes cool, whip up your frosting. Whisk the vegan butter and powered sugar until creamy Add in your cooled, melted chocolate and mix until smooth, then add in the cocoa powder. Whisk everything on high until light and fluffy. Add in some almond milk if the frosting is too thick. You can always add more powdered sugar or cocoa if it's too thin. Once the cake is cooled, frost with your chocolate frosting. If you want to write a note, melt a little bit of white chocolate in the micro for 30 seconds at a time until smooth and melted. Transfer to a plastic sandwich bag, and cut the tip off one corner. Pipe your message onto your cake, and add some pretty flowers if desired. *Note: I always wrap a little parchment around the stems of my flowers before inserting them into the cake.


Whatever your opinion is of Valentine's Day, I hope you enjoy!

xoxo


Friday, December 16, 2016

Flourless, Refined Sugar Free Brownie Donuts


OHmyglob. OHMYGL..... Ok you get it. These donuts are what dreams are made of! I'm not exaggerating. Moist, dense, satisfiying...check. Sinful chocolate flavor...check. Flourless?? Refined sugar free??? What??????? Yes. And they're glazed too. Uh huh, uh huh. Also, if you count hemp seeds as sprinkles, then these are sprinkled, baby! What's the catch? There isn't one, unless you don't like donuts, chocolate, almond butter or happiness.

Ingredients:

1 cup natural unsalted creamy or crunchy almond butter
1 ripe banana, mashed
2 tblsp. organic cacao
1 tsp. baking soda
2 tblsp. pure grade A or B maple
2 tblsp. unsweetened vanilla almond milk
1/2 tsp. vanilla

Glaze:
1/4 cup dark chocolate (chips or chopped)
1 tblsp. coconut oil


Directions:

Preheat the oven to 350 degrees. Prepare a donut pan by greasing with coconut oil or non-stick spray. Use an electric mixer to mash the banana. Add in the almond butter and whisk until smooth. Add in maple, almond milk and vanilla and mix until combined. In a small, separate bowl mix together cacao and baking powder. Whisk into the wet ingredients just until combined. Spoon the batter into your prepared pan and bake for 12-16 minutes or until the donuts spring back when touched. Remove from the donut pan and transfer to a cooling rack until completely cooled. While the donuts cool, melt dark chocolate chips or chopped chocolate (I use Trader Joe's 72% dark) and coconut oil in the micro for 30 seconds at a time until melted smooth when stirred. Dip your donuts face first into the chocolate glaze and place on parchment paper. Allow the chocolate to set before serving.


I sprinkled a few with hemp seed for a little extra nutritional boost! Try topping them with coconut flakes, nuts, whatever you want!

xoxo

Thursday, December 8, 2016

Guilt Free Dark Chocolate PB Cups


I have a long, semi-complicated, love affair with peanut butter cups. As with any long-time love, we have gone through a lot of ups and downs. Around 6 years old, my passion for peanut butter cups was hot and heavy, and I remember hiding in a display cabinet in a hardware store with an empty wrapper and the guilty scent of peanut butter and chocolate on my breath. Oh, the memories. Unfortunately, one too many stale-tasting PB cups from the convenience store shelf, and my changing taste buds started to wear on our relationship. Over the past few years, I've also become more conscious of nutrition labels and ingredients. I've also been pleasantly surprised by how easy it is to make my own, guilt-free versions of my favorite treats. Using deep, dark chocolate, coconut oil and natural peanut butter, I've finally found my PB soul mate. The best peanut butter cups I have ever had. Talk about happily ever after!


Ingredients:

1 cup dark chocolate
2 tblsp coconut oil
Natural unsalted creamy or crunchy peanut butter

Directions:

Line a mini muffin tin with 10-12 mini muffin liners or silicon liners. In a small pot over low heat, melt the chocolate chips and coconut oil until smooth. Remove from heat and let cool for a few minutes. Divide the melted chocolate among the cupcake liners. Spoon a dollop of peanut butter into each one. Top with remaining melted chocolate and pop into the freezer for at least 20 minutes or until the chocolate has hardened. Enjoy!

I like to top my PB cups with coconut flakes or hemp seed when the mood strikes!


xoxo

Tuesday, November 29, 2016

Pumpkin Cheesecake Brownies (Gluten and Refined Sugar Free)


There are only a few days of November left, so I thought I better make use of any of the pumpkin that I have left over from Thanksgiving... You know, before we venture into the season where pumpkin desserts are no longer appropriate. These brownies, however are always appropriate. You can easily leave out the pumpkin and make cheesecake brownies or leave out the swirl altogether and just make some good old chocolate chunkers. Of course, these are not your run-of-the-mill brownies. These babies are wholesome, gluten free, refined sugar free, no butter, no nonsense. Just dark, dense chocolate goodness paired with a creamy, sweet-spicy pumpkin cheesecake swirl. That last sentence probably has you thinking... uh, I thought you said these were "wholesome". Dark, dense, creamy, sweet-spicy and cheesecake sounds anything but wholesome. Well, bake on my skeptical friends! Be amazed.


 Pumpkin Cheesecake Swirl Brownies
Adapted from Bakerita

Ingredients:

6 oz. dark chocolate
½ cup coconut oil
⅔ cup coconut sugar
2 eggs
1 teaspoon vanilla extract
⅔ cup oat flour
1 tablespoon cacao powder

Pumpkin Cheesecake Swirl
4 ounces cream cheese
¼ cup coconut sugar
⅓ cup pumpkin puree
1 teaspoon cinnamon
¼ teaspoon nutmeg
1 tsp cornstarch


Preheat the oven to 325 degrees. Line an 8x8 baking pan with parchment paper and set aside. Melt the dark chocolate and coconut oil in a glass bowl for 30 seconds at a time, until melted smooth. Stir in the sugar and vanilla, then stir in the eggs one at a time. Fold in the oat flour and cacao powder, until just combined. Don't overmix!

In a standing mixer, whisk together the cream cheese and pumpkin until smooth. Whisk in the cornstarch. Add in the coconut sugar, cinnamon and nutmeg. Pour half of the brownie batter into your prepared pan. Then spoon half of the pumpkin cheesecake batter over the top. Cover with remaining brownie batter and then drizzle the rest of the pumpkin cheesecake mixture over the top randomly. Run a knife through the batter to create a swirl. Bake for 20-25 minutes or until a knife inserted in the middle comes out with a few moist crumbs. Lift the brownies out of the pan by the parchment paper and let cool on a wire rack before cutting into squares.

Try them with a little almond butter on top, you won't be sorry!

Wednesday, November 9, 2016

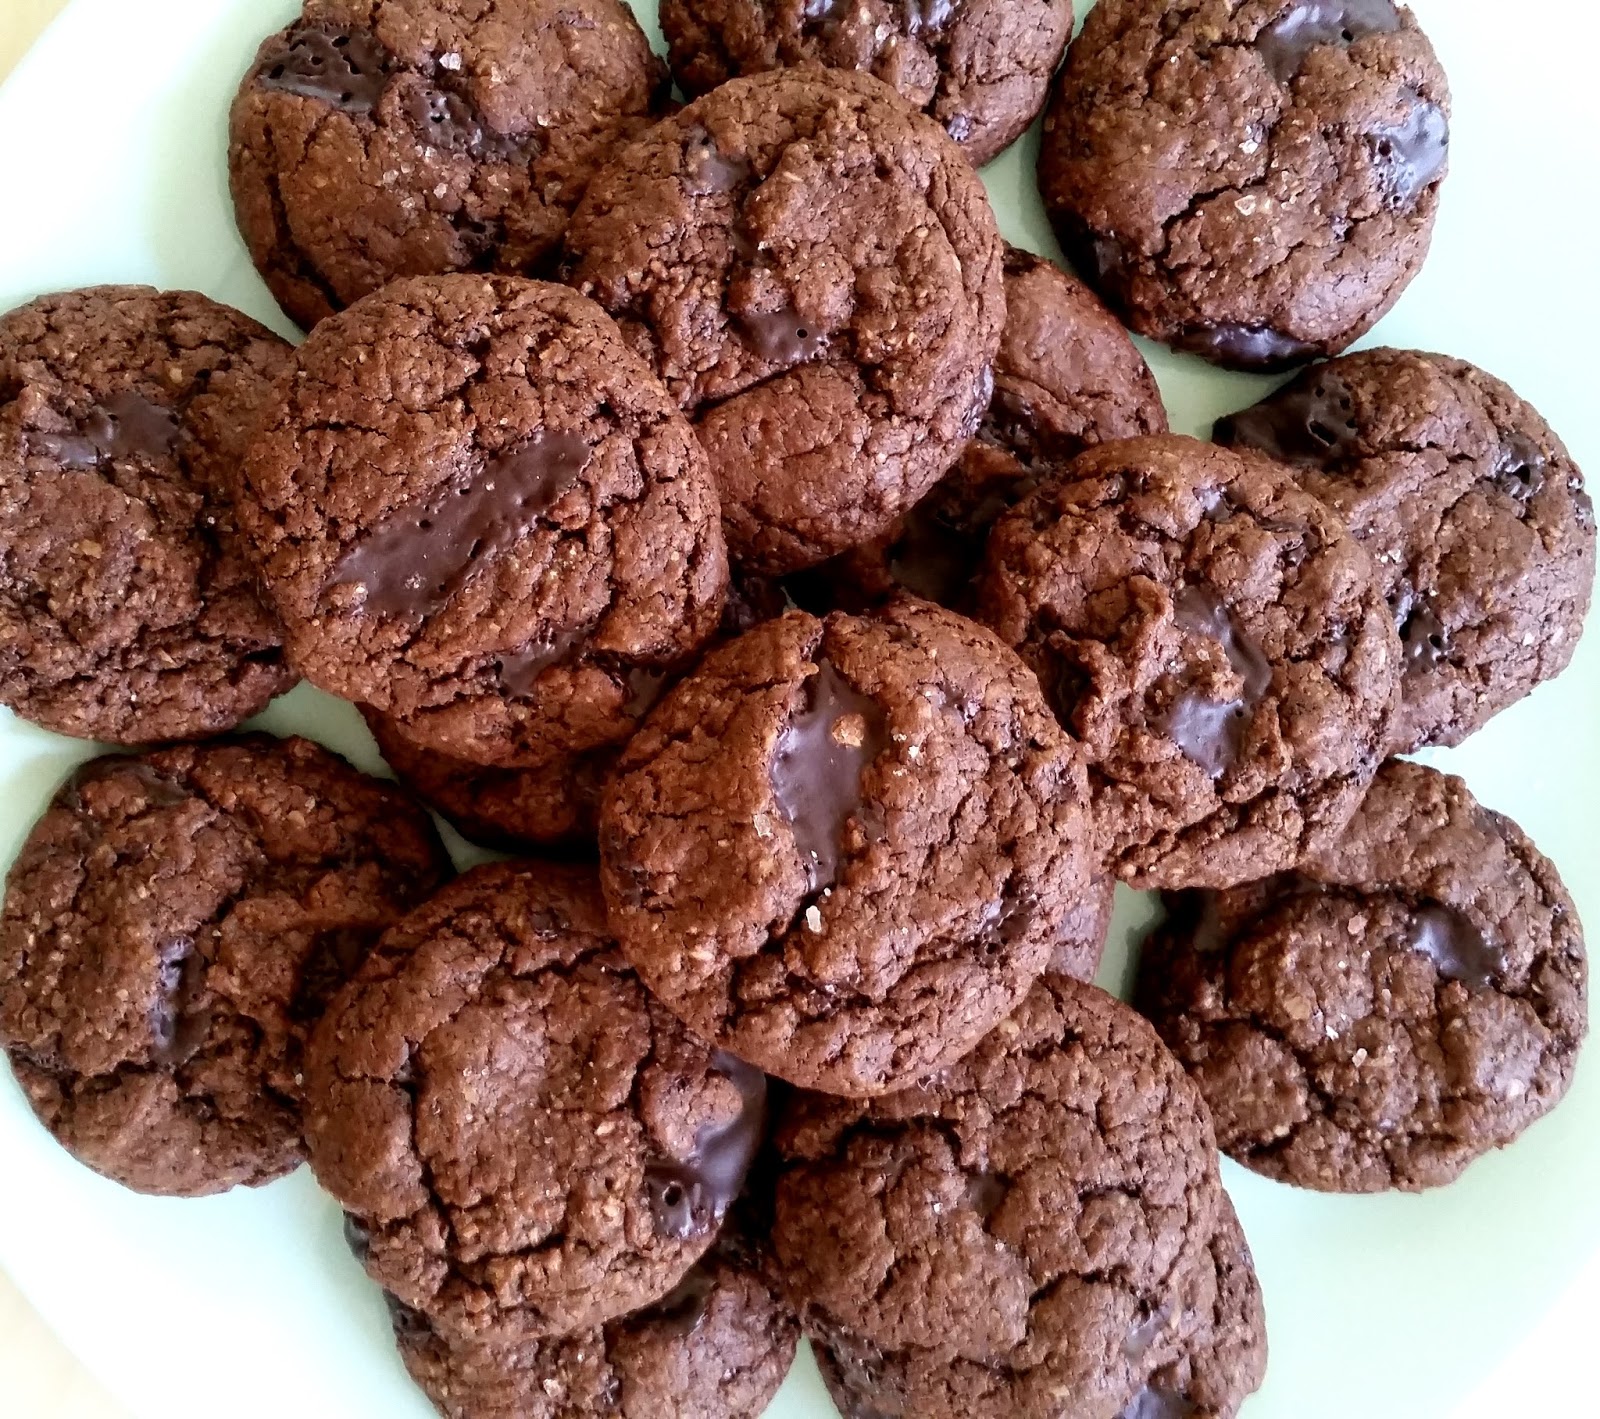
Feel Good Double Chocolate Chunk Cookies (Vegan & Gluten Free!)


Wow. Well then. Ok... I guess it doesn't really matter what the reason is that you may be feeling like you NEED a cookie today, but it doesn't mean that you have to stuff your face with crap that will inevitably make you feel worse long after the initial shock, and the sugar high, wears off. I've begun to realize that the answer to a bad day (week, month, year) is a lot of self-reflection, self-care and CHOCOLATE (well, duh)! When you're working with good quality, dark and dreamy chocolate, that whole "too much of a good thing" saying turns into a whole lot of blah blah blah (my hands are over my ears, chocolate is in my mouth, and I CAN'T HEAR YOU!) I never claimed to be mature, ok? Let's just get that straight. Ha! So, anywho... I made some super yummy, guilt-free double chocolate chip cookies and they are ah-maz-ing. Oh, and did I mention that they are gluten free, flourless, Vegan, refined sugar free, and gooey as heck? Yeahh babe. Get at me.

Double Chocolate Chunk Cookies
Adapted from Oh She Glows

Ingredients:

1 tablespoon ground flax mixed with 3 tablespoons warm water
1/4 cup soft, but not melted coconut oil
1/4 cup raw creamy almond butter (I used Trader Joes) 
2/3 cup unpacked coconut sugar
1 teaspoon vanilla extract
1/2 teaspoon baking soda
1/2 teaspoon baking powder
3 tablespoons organic cacoa powder (can sub regular cocoa)
1 1/2 cups gluten-free oat flour
4 large squares of dark chocolate, melted (I used Trader Joes 1lb. 72% bar)
A good amount of chopped dark chocolate (I eyeballed it)


Directions: Preheat the oven to 350 degrees. Mix the flax seed with warm water and let stand for at least one minute. Add in remaining wet ingredients and sugar and whisk until creamy. Heat chocolate until just melted, about 30 seconds. Whisk into the wet ingredients. Grind 1 1/2 cups of oats into a flour and place in a separate bowl. Mix in the remaining dry ingredients and add into the wet ingredients. Fold in the chocolate chunks. Roll the dough into 1 inch balls and bake on a silpat mat or parchment lined cookie sheet for 8 minutes. Remove from oven and let stand at least one minute before transferring to a wire rack. Eat while gooey, or cooled. Can't go wrong here, friends.


xoxo


Monday, October 3, 2016

The BEST Gluten Free Vegan Fudge Brownies


What do you want a brownie to be? Dense, moist, fudgey, with a strong POW! of chocolate flavor. What don't you want a brownie to be? Full of refined sugars, flour and fat. Sounds like a too-good-to-be-true brownie situation, right? WRONG. You just have to be determined enough to make those brownie dreams a reality. Luckily for you, I've done most of the work so you can just bake and enjoy ;]

Gluten Free Vegan Fudge Brownies

Ingredients:

1 cup natural unsalted almond butter or smooth peanut butter
1/3 cup REAL Grade B maple syrup
2 tbsp cocoa powder
1 ripe banana
1/2 tsp vanilla
1 tsp baking powder


Directions:

Line a bread pan with parchment paper and preheat the oven to 350 degrees. In a standing mixer, or with a hand mixer, whisk together the banana, almond or pb, vanilla and maple. Mix in the cocoa powder and baking powder until smooth. Pour into your prepared bead pan and smooth out evenly. Sprinkle with some dark chocolate or vegan chips if desired. Bake for 15-20 minutes. Remove from oven and let cool in the pan before removing. To remove, gently lift the bars out by the parchment paper hanging over the sides. Refrigerate for at least one hour before slicing.

*I left out the chocolate chips, and melted a little coconut oil and dark chocolate, drizzled it over the brownies and then sprinkled some hemp seeds over the top before popping these babies in the fridge. Waaaay good.


These things are super duper addicting, and I found myself eating one before breakfast, as a snack and basically everywhere in between. I recommend cutting them into little squares for this very reason :]

xoxo